What are Tape-In Hair Extensions?
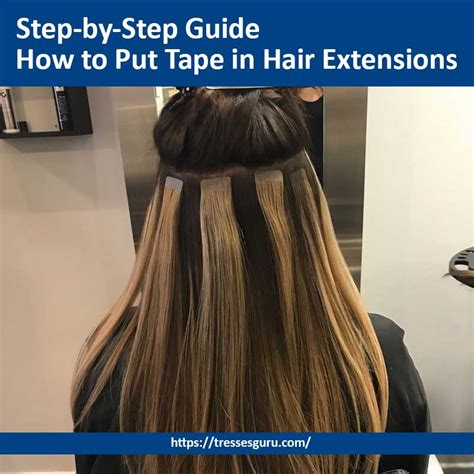
Tape-in hair extensions are flat, pre-taped hair wefts that are bonded to the natural hair at the root using double-sided adhesive tape. This innovative technique allows for discreet and realistic hair enhancement, achieving volume, length, and color customization.

Benefits of Tape-In Hair Extensions
- Natural Appearance: Tape-in extensions blend seamlessly with natural hair, creating an undetectable transition between the two.
- Easy Installation: The application process is relatively quick and painless, taking approximately 1-2 hours.
- Minimal Damage: Unlike other extension methods that require heat or glue, tape-in extensions do not cause significant damage to the hair.
- Removable and Reusable: The extensions can be easily removed and reapplied without compromising their quality or durability.
- Versatile Styling: Tape-in extensions offer flexibility for various hairstyles, from sleek ponytails to voluminous curls.
Types of Tape-In Hair Extensions
Tape-in hair extensions come in a wide range of lengths, colors, and textures to suit individual preferences and hair types.
Length:
– Short (12-16 inches)
– Medium (18-22 inches)
– Long (24-30 inches)
Color:
– Natural shades to match existing hair
– Fashionable highlights and lowlights
– Bold and vibrant colors
Texture:
– Straight
– Wavy
– Curly
Cost and Longevity
The cost of tape-in hair extensions varies depending on the hair quality, length, and salon. Typically, a full set ranges from $250 to $1,000. With proper care, these extensions can last for 6-8 weeks before requiring reapplication.
How to Install Tape-In Hair Extensions
Materials:
– Tape-in hair extensions
– Hair clips
– Sectioning comb
– Scissors
Steps:
1. Section Hair: Divide the natural hair into sections for ease of application.
2. Apply Tape: Place a piece of tape along the root of a section of hair.
3. Press Extensions: Align the extension with the tape and press it firmly into place, ensuring a secure bond.
4. Repeat: Continue applying extensions to the desired areas, staggering the placement for a natural blend.
Removal and Maintenance
Removal:
– Use a professional removal solution to dissolve the adhesive.
– Gently peel the extensions away from the natural hair.
Maintenance:
– Wash hair as usual, avoiding direct heat on the tape.
– Brush hair regularly to prevent tangles.
– Visit a salon every 6-8 weeks for reapplication and maintenance.
Tips and Tricks
- Choose High-Quality Extensions: Invest in extensions made from real human hair or high-grade synthetic fibers for durability and longevity.
- Match Hair Texture: Select extensions that closely match the texture of your natural hair for a seamless blend.
- Stagger Placement: Avoid placing extensions directly above each other to create a more natural look.
- Use Heat Protectant: Apply a heat protectant spray before using heat styling tools on the extensions to prevent damage.
- Avoid Over-Washing: Over-washing can loosen the adhesive, so limit it to 2-3 times per week.
Common Mistakes to Avoid
- Overapplying Extensions: Too many extensions can weigh down the hair and cause tension at the roots.
- Not Blending Properly: Failing to blend the extensions with the natural hair can result in a visible transition line.
- Using Low-Quality Extensions: Cheap extensions may be made from synthetic materials that do not blend well or last long.
- Improper Removal: Using harsh chemicals or pulling the extensions off can damage the natural hair.
- Not Seeking Professional Help: Attempting to install or remove tape-in extensions without professional guidance can lead to errors and hair damage.
Conclusion
Tape-in hair extensions offer a convenient and versatile solution for transforming hair. By understanding the different types, installation techniques, and maintenance tips, individuals can achieve their desired hair goals with confidence and ease.
