Introduction
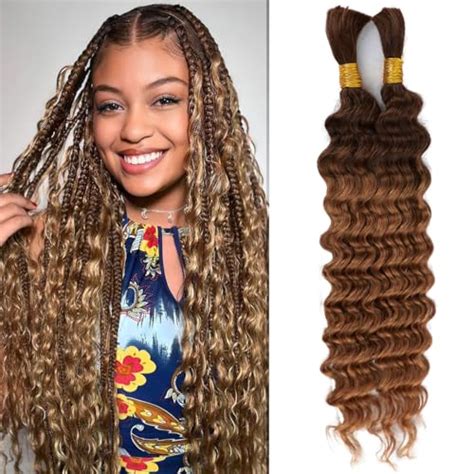
Ombre braiding, a captivating hair trend, has taken the fashion world by storm, offering an endless spectrum of gradient-infused hairstyles. With its seamless transition from one hue to another, ombre braiding empowers individuals to express their creativity and embrace a unique and eye-catching look.

Understanding Ombre Braiding Techniques
Ombre braiding encompasses a vast array of techniques, each yielding distinct aesthetic results. Some popular methods include:
- Classic Ombre Braiding: Involves transitioning from one color at the roots to another at the tips, creating a smooth, gradient effect.
- Inverted Ombre Braiding: Reverses the classic approach, starting with darker shades at the tips and gradually lightening towards the roots.
- Balayage Braiding: Utilizes a hand-painted technique to create a more gradual, natural-looking gradient.
- Foilyage Braiding: Similar to balayage, but involves wrapping sections of hair in foil to enhance lift and control the transition.
Benefits of Ombre Braiding
Ombre braiding offers numerous advantages, including:
- Versatility: Suitable for all hair types and textures, allowing individuals to customize their look.
- Low Maintenance: Unlike traditional highlighting, ombre braiding requires minimal touch-ups, providing lasting color with less maintenance.
- Dimension and Depth: Adds depth and dimension to hair, creating an illusion of volume and body.
- Trendy and Fashionable: Embraces current fashion trends, making it a popular choice among fashion enthusiasts.
Step-by-Step Guide to Ombre Braiding
Achieving a flawless ombre braid requires careful technique and precise execution. Here’s a comprehensive step-by-step guide:
Step 1: Prepare Your Hair:
- Start with clean, dry hair.
- Brush through to remove tangles and ensure even distribution of color.
Step 2: Divide Your Hair:
- Section your hair into four equal parts: two in the front and two in the back.
- Clip up the sections you’re not working on to keep them out of the way.
Step 3: Apply Bleach:
- Choose a bleach that aligns with your hair’s porosity and desired level of lift.
- Apply the bleach to the tips of your hair, where you want the lightest shade.
- Use a fine-toothed comb to blend the bleach into the mid-lengths and roots.
Step 4: Check for Lift:
- Monitor the hair’s lift every 10-15 minutes by removing a small section of bleach.
- Once you achieve the desired lift, rinse the bleach thoroughly.
Step 5: Tone Your Hair:
- Apply a toner to neutralize any unwanted brassiness or yellow tones.
- Leave it on for the recommended time and then rinse.
Step 6: Color Your Roots:
- Choose a hair color that complements the bleached tips.
- Apply it to the roots and mid-lengths, blending it into the previous color.
- Process according to the manufacturer’s instructions.
Step 7: Rinse and Style:
- Rinse the color thoroughly and apply conditioner to moisturize your hair.
- Style as desired, showcasing your vibrant ombre braid.
Tips for Ombre Braiding
- Use a Professional: Consider working with a skilled colorist to ensure precise application and optimal results.
- Protect Your Hair: Bleach can damage hair, so use protective treatments, such as deep conditioners and hair masks.
- Experiment with Colors: Explore different color combinations to find the perfect match for your personal style.
- Maintain Your Color: Touch up your roots every 6-8 weeks and use color-safe hair care products to maintain the vibrancy of your ombre braid.
FAQs about Ombre Braiding
1. Is ombre braiding right for my hair type?
- Ombre braiding is suitable for all hair types, including natural, colored, or previously highlighted hair.
2. How long does an ombre braid last?
- An ombre braid can last 4-6 months, depending on the rate of hair growth and the level of maintenance.
3. How do I care for my ombre braid?
- Use color-safe hair care products, avoid heat styling, and protect your hair from the sun to maintain its vibrancy.
4. Can I achieve an ombre braid at home?
- While possible, achieving a professional-looking ombre braid at home requires skill and experience. It’s recommended to consult a colorist for optimal results.
Innovative Applications for Ombre Braiding
The versatility of ombre braiding extends beyond traditional hairstyles. Here are some creative and cutting-edge applications:
- Braided Crown Extensions: Enhance braids with ombre extensions to add volume, texture, and a pop of color.
- Ombre Halo Wigs: Create stunning wigs with seamless ombre transitions, offering a quick and versatile way to transform your look.
- 3D Ombre Braiding: Elevate braids with intricate 3D designs and highlights, creating a truly unique and eye-catching style.
Conclusion
Ombre braiding is an art form that empowers individuals to embrace their creativity and express their unique style. With its versatility, low maintenance, and endless possibilities, ombre braiding has become a staple in the hair fashion industry. Whether you prefer classic, inverted, balayage, or foilyage techniques, there’s an ombre braiding method to suit every taste. By following the step-by-step guide, exploring innovative applications, and seeking professional guidance when needed, you can achieve a flawless ombre braid that turns heads and complements your individuality.