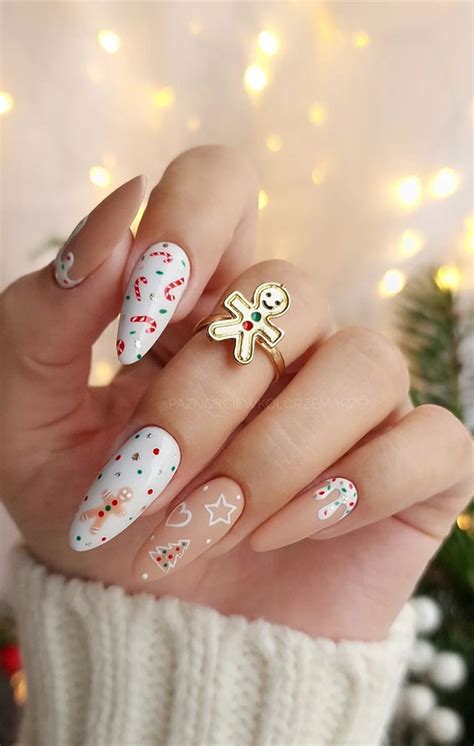
‘Tis the season to sparkle and shine, and your nails are no exception! Whether you’re attending a Christmas party, family gathering, or simply want to add some festive cheer to your daily routine, these easy Christmas nail designs have got you covered. With a few simple steps and basic tools, you can create stunning holiday-themed nails that will turn heads and spread the Christmas spirit.

Why Festive Nails Matter
Christmas is a time for joy, celebration, and sharing the warmth of the season. Adorning your nails with festive designs not only adds a touch of glam to your holiday attire but also:
- Enhances your Christmas spirit and puts you in a cheerful mood
- Expresses your creativity and personality
- Complements your Christmas outfits and adds a festive touch
- Creates a fun and festive atmosphere wherever you go
Benefits of Easy Christmas Nail Designs
Opting for easy Christmas nail designs offers numerous benefits:
- They are perfect for beginners and those short on time
- They require minimal skills and effort
- They use simple materials that are readily available
- They allow for customization and personalization
Effective Strategies for Easy Christmas Nails
-
Prepare Your Nails: Clean and file your nails to your desired shape. Apply a base coat to prevent staining and enhance polish adhesion.
-
Choose Your Colors: Select a festive color palette, such as red, green, white, gold, or silver. Consider using glitter polishes, nail stickers, or nail art pens for added embellishments.
-
Create Basic Shapes: Start with simple shapes like stripes, dots, or snowflakes. Use nail art tape or stencils to guide your designs.
-
Experiment with Textures: Add depth and dimension to your nails by using matte, glossy, or textured polishes. Combine different finishes to create a unique look.
-
Don’t Be Afraid to Mix and Match: Play around with different colors, patterns, and accessories to create one-of-a-kind Christmas nails. The possibilities are endless!
Step-by-Step Approach to Easy Christmas Nail Designs
Candy Cane Nails:
- Paint your nails a bright red or white.
- Using a thin nail art brush, draw thin, diagonal lines in a contrasting color (white or red) to resemble candy canes.
Snowflake Nails:
- Paint your nails a neutral color, such as white, beige, or gray.
- Dip a dotting tool into a contrasting color (blue, silver, or gold) and create small dots in a snowflake pattern.
Christmas Tree Nails:
- Paint your nails a dark green.
- Use a thin brush or nail art pen to create a triangle shape at the top of the nail.
- Paint small dots or lines to resemble Christmas tree lights and ornaments.
Easy Christmas Nail Art Ideas
Table 1: Simple Christmas Nail Designs for Beginners
| Design | Steps |
|---|---|
| Red and Green Stripes | Paint alternate stripes of red and green vertically or horizontally. |
| Gold and Silver Dots | Use a dotting tool to create gold and silver dots of varying sizes. |
| Snowflake Stencils | Apply snowflake stencils to your nails and paint over them in white or blue. |
| Candy Cane Tips | Paint the tips of your nails red or white and add diagonal lines in a contrasting color. |
| Christmas Lights | Create small dots of different colors in a row to resemble Christmas lights. |
Table 2: Festive Christmas Nail Designs for Parties
| Design | Steps |
|---|---|
| Christmas Tree Nail Art | Paint your nails green and create a triangular shape with a star at the top. Add dots or lines for ornaments. |
| Winter Wonderland Nails | Paint your nails a light blue or white and add silver glitter for a snowy effect. Draw wintery scenes, such as trees or snowmen. |
| Red and Gold Gradient Nails | Apply a red polish at the base of your nails and a gold polish at the tips. Use a makeup sponge to blend the colors. |
| Santa Claus Nails | Paint your nails red and add a white beard and mustache to the tip of each nail. Use black polish for the eyes and nose. |
| Reindeer Antlers Nails | Paint your nails brown and draw antlers with a black nail art pen. Add gold glitter or rhinestones for embellishments. |
Table 3: Elegant Christmas Nail Designs for Special Occasions
| Design | Steps |
|---|---|
| Snowflake Lace Nails | Paint your nails white and use a nail art brush to create delicate lace patterns with silver or gold polish. Add rhinestones for a touch of sparkle. |
| Christmas Plaid Nails | Paint alternate stripes of red, green, and white to create a plaid pattern. Use nail tape or stencils for clean lines. |
| Velvet Christmas Nails | Apply a matte black or deep red polish to your nails with a makeup sponge. Use a top coat with a velvety texture for a luxurious finish. |
| Christmas Ornament Nails | Paint your nails a festive color and add small, round stickers or rhinestones to resemble ornaments. Use a glossy top coat for a shiny effect. |
| Gold and Green Swirl Nails | Apply a green polish to your nails and use a thin brush or nail art pen to create gold swirls. Finish with a glitter top coat for extra glam. |
Table 4: Unique Christmas Nail Designs for Creative Individuals
| Design | Steps |
|---|---|
| Gingerbread Man Nails | Paint your nails a light brown or beige and use a nail art pen to draw gingerbread man shapes. Add gingerbread details, such as buttons, icing, and eyes. |
| Fair Isle Christmas Nails | Paint your nails a neutral color and use thin nail art brushes to create Fair Isle patterns with traditional Christmas colors, such as red, green, and white. |
| Christmas Carol Lyric Nails | Paint your nails different colors and write Christmas carol lyrics on each nail with a fine-tip nail art pen. Use glitter or metallic accents for embellishments. |
| Wintery Night Sky Nails | Paint your nails a dark blue or black and use a makeup sponge to dab on white polish to create a starry night effect. Add glitter or silver nail art pens for stars and moons. |
| Santa’s Workshop Nails | Paint your nails a festive color and add small nail art accessories, such as tiny Santa hats, presents, or candy canes. Use a clear top coat to secure the embellishments. |
