Deck the halls…with festive nails! Get ready to spread Christmas cheer with 10 easy-to-create nail designs that will make you the envy of every holiday gathering.

1. Classic Red and Green Stripes
Skills: Beginner
Time: 15 minutes
Materials:
* Red nail polish
* Green nail polish
* Nail brush or toothpick
Steps:
1. Apply a base coat to protect your nails.
2. Paint your nails with a thin coat of red polish.
3. Once the red polish is dry, dip a nail brush or toothpick into green polish and create thin stripes across your nails.
4. Allow the stripes to dry completely.
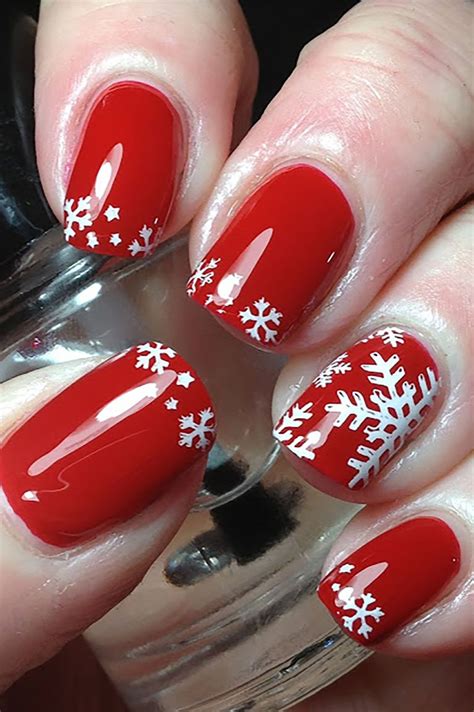
2. Glittery Snowflakes
Skills: Intermediate
Time: 20 minutes
Materials:
* White nail polish
* Silver glitter
* Top coat
* Nail brush or toothpick
Steps:
1. Apply a base coat to your nails.
2. Paint the tips of your nails with white polish.
3. While the polish is still wet, sprinkle silver glitter over the tips.
4. Blow off any excess glitter.
5. Apply a top coat to seal in the design.
3. Festive Candy Cane Swirls
Skills: Beginner
Time: 15 minutes
Materials:
* Red nail polish
* White nail polish
* Toothpick or nail brush
Steps:
1. Apply a base coat to your nails.
2. Paint a thin line of red polish down the center of your nails.
3. Paint a thin line of white polish next to the red line.
4. Use a toothpick or nail brush to swirl the two colors together.
5. Allow the design to dry completely.
4. Christmas Tree Nail Art
Skills: Intermediate
Time: 25 minutes
Materials:
* Green nail polish
* Red nail polish
* Brown nail polish
* Nail brush or toothpick
Steps:
1. Apply a base coat to your nails.
2. Paint your nails with green polish.
3. Once the green polish is dry, use a nail brush or toothpick to create brown lines for the tree trunk.
4. Create small red dots for the ornaments.
5. Allow the design to dry completely.
5. Festive Polka Dots
Skills: Beginner
Time: 10 minutes
Materials:
* Red nail polish
* Green nail polish
* Nail brush or toothpick
Steps:
1. Apply a base coat to your nails.
2. Paint your nails with red polish.
3. Once the red polish is dry, dip a nail brush or toothpick into green polish and create polka dots on your nails.
4. Allow the design to dry completely.
6. Jolly Reindeer Nails
Skills: Intermediate
Time: 20 minutes
Materials:
* Brown nail polish
* Red nail polish
* Black nail polish
* Nail brush or toothpick
Steps:
1. Apply a base coat to your nails.
2. Paint your nails with brown polish.
3. Once the brown polish is dry, use a nail brush or toothpick to create a reindeer head shape on your nails.
4. Add eyes and antlers with black polish.
5. Use red polish to create a nose.
6. Allow the design to dry completely.
7. Festive Plaid Nails
Skills: Intermediate
Time: 25 minutes
Materials:
* Red nail polish
* Green nail polish
* White nail polish
* Nail brush or toothpick
Steps:
1. Apply a base coat to your nails.
2. Paint your nails with red polish.
3. Once the red polish is dry, use a nail brush or toothpick to create thin lines of green polish across your nails.
4. Repeat with white polish, creating a plaid pattern.
5. Allow the design to dry completely.
8. Cozy Snowflake Sweater Nails
Skills: Intermediate
Time: 25 minutes
Materials:
* Nude nail polish
* White nail polish
* Gray nail polish
* Nail brush or toothpick
Steps:
1. Apply a base coat to your nails.
2. Paint your nails with nude polish.
3. Once the nude polish is dry, use a nail brush or toothpick to create a snowflake design on your nails.
4. Add gray lines to the snowflake to make it look like a sweater.
5. Allow the design to dry completely.
9. Merry and Bright Nail Art
Skills: Beginner
Time: 10 minutes
Materials:
* Green nail polish
* Red nail polish
* Gold glitter
Steps:
1. Apply a base coat to your nails.
2. Paint your nails with green polish.
3. Once the green polish is dry, paint a red circle in the center of each nail.
4. Sprinkle gold glitter over the red circles.
5. Allow the design to dry completely.
10. Ho-Ho-Holly Jolly Nails
Skills: Beginner
Time: 10 minutes
Materials:
* Red nail polish
* Green nail polish
* White nail polish
Steps:
1. Apply a base coat to your nails.
2. Paint your nails with red polish.
3. Once the red polish is dry, paint a green leaf on each nail.
4. Add white berries to the leaves.
5. Allow the design to dry completely.
- Use a quick-dry top coat to speed up the drying process.
- If you don’t have a nail brush, you can use a toothpick or even a bobby pin to create designs.
- If you make a mistake, simply wipe it off with a cotton ball dipped in nail polish remover.
- Be patient and don’t give up! Even if your designs don’t turn out perfectly the first time, you can improve with practice.
With these easy Christmas nail art designs, you can spread holiday cheer wherever you go. So get creative, have fun, and enjoy the festive season!