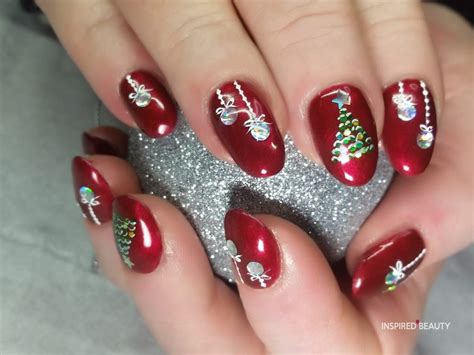
Christmas is a time for joy, family, and of course, festive nails. But if you’re short on time or artistic skill, don’t worry – these easy Christmas nail designs will have you looking holiday-ready in no time.

1. Candy Cane Stripes (5 minutes)
- Paint nails white.
- Use a thin brush to paint red diagonal stripes.
- Wait for first layer to dry, and paint a second layer.
- Seal with top coat.
2. Festive French Tips (7 minutes)
- Paint nails with a base coat of white.
- Tip nails with desired Christmas color (red, green, gold).
- Wait for first layer to dry, and paint a second layer.
- Seal with top coat.
3. Christmas Tree Triangles (9 minutes)
- Paint nails green.
- Use a dotting tool to create triangles in various sizes and colors (red, yellow, white).
- Add a star or bead to the top of the tree (optional).
- Seal with top coat.
4. Reindeer Antlers (12 minutes)
- Paint nails with a base coat of brown.
- Paint two curved lines for the antlers, tapering towards the tips.
- Add a red nose and black eyes.
- Seal with top coat.
5. Snowflake Accents (11 minutes)
- Paint nails with a base coat of any color.
- Use a dotting tool to create small dots in a snowflake pattern.
- Connect the dots with a thin brush to form the snowflake.
- Seal with top coat.
6. Festive Plaid (13 minutes)
- Paint nails with a base coat of red or green.
- Use a thin brush to paint diagonal lines in alternating colors (white, black).
- Repeat the process in the opposite direction to create a plaid pattern.
- Seal with top coat.
7. Candy Cane Toes (15 minutes)
- Paint toenails white.
- Use a thin brush to paint diagonal red stripes.
- Wait for first layer to dry, and paint a second layer.
- Add a black stripe in the middle for the candy stick effect.
- Seal with top coat.
Tips for Easy Christmas Nail Art
- Use a base coat and top coat to protect your nails.
- Clean your brush with acetone after each use.
- Practice your designs on paper before applying them to your nails.
- Use thin brushes for precise lines.
- Let each layer dry completely before applying the next.
Benefits of Easy Christmas Nail Designs
- Saves time and effort.
- Can be done by beginners.
- Perfect for festive occasions.
- Adds a touch of Christmas cheer to your look.
- Can be customized to your personal style.
Conclusion
With these easy Christmas nail designs, you can create a festive and stylish look in minutes. So gather your supplies, grab your nail polish, and let your creativity shine this holiday season!
