Introduction
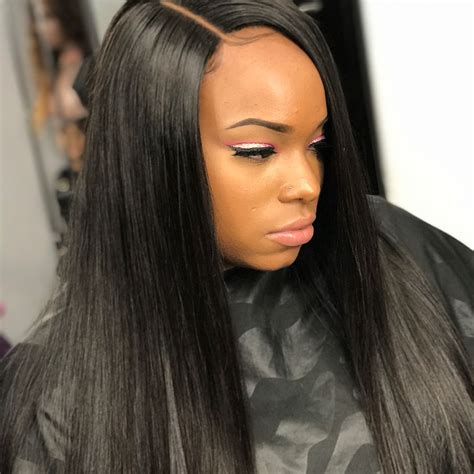
Closure sew-ins have revolutionized the hair extension industry, offering a versatile and long-lasting solution for achieving fuller, longer locks. This comprehensive guide delves into the intricacies of closure sew-ins, exploring their benefits, techniques, and common mistakes to avoid.

Benefits of Closure Sew-Ins
Closure sew-ins provide numerous advantages over other hair extension methods:
- Customizable: Can be tailored to specific head shape and hair type
- Versatile: Suitable for a wide range of hairstyles, from buns to braids
- Long-lasting: Can last up to 3-6 months with proper care
- Protective: Shields natural hair from heat, styling, and environmental damage
- Volume and length: Enhances hair volume and length for a fuller appearance
Closure Sew-In Techniques
Several techniques exist for closure sew-ins, each with its own advantages and disadvantages.
1. Cornrow Method:
– Hair is braided into cornrows along the scalp, and the closure is sewn on top of these braids.
– Provides a stable base for the closure but can create tension on the scalp.
2. Track Method:
– Sewn-in tracks of hair are attached to existing braids or cornrows.
– Offers more flexibility than the cornrow method and reduces scalp tension.
3. Hybrid Method:
– Combines elements of both the cornrow and track methods.
– Provides a balance of stability and flexibility, making it suitable for most hair types.
Choosing the Right Closure
Selecting the ideal closure is crucial for a seamless and natural-looking sew-in. Consider the following factors:
- Type: Lace or silk base closures
- Density: The fullness and thickness of the closure
- Texture: Matches the texture of your natural hair
- Color: Complements the shade of your hair
- Size: Covers the desired area on your scalp
Step-by-Step Sew-In Process
1. Prep the Hair: Wash, condition, and detangle hair to remove product buildup.
2. Divide the Hair: Section off the hair into smaller sections using clips or hair ties.
3. Apply Cornrows/Tracks (if needed): Create cornrows or attach tracks to secure the closure.
4. Position the Closure: Place the closure on the designated area and adjust it for a natural fit.
5. Sew the Closure: Using a curved needle and thread, sew the lace or silk base of the closure to the scalp or tracks.
6. Style the Hair: Blend the closure hair with your natural hair using styling tools such as flat irons or curling wands.
Closure Wig Installation: An Innovative Technique
A closure wig installation combines the benefits of a closure sew-in with the convenience of a wig.
- Semi-permanent: Sewn into the front of your scalp, providing a natural-looking hairline.
- Versatile: Can be styled in various ways and customized to your preferences.
- Time-saving: No need to re-sew the closure every few weeks.
Common Mistakes to Avoid
- Overtightening: Avoid pulling the thread too tightly, as this can cause scalp irritation and hair breakage.
- Improper Closure Placement: Ensure the closure is positioned evenly and covers the desired area on your scalp.
- Lack of Maintenance: Regular washing, conditioning, and styling are essential for long-lasting extensions.
- Ignoring Scalp Health: Keep your scalp clean and moisturized to prevent dryness, itching, or infections.
- Insufficient Research: Consult with a professional hairstylist before getting a closure sew-in to determine the best technique for your hair type.
FAQs
1. How long does a closure sew-in last?
– Up to 3-6 months with proper care and maintenance.
2. Can I wash and style my hair after a closure sew-in?
– Yes, but it’s essential to use gentle hair care products and to avoid heat styling excessively.
3. How often should I get my closure sew-in re-tightened?
– Every 2-3 weeks to ensure it remains secure and comfortable.
Conclusion
Closure sew-ins offer a fantastic solution for enhancing hair volume, length, and versatility. By choosing the right closure, technique, and hairstylist, you can achieve a natural-looking and long-lasting hairstyle that meets your needs. Remember to follow proper care and maintenance guidelines to extend the lifespan of your extensions and maintain the health of your scalp.
Appendix
Table 1: Closure Sew-In Techniques Comparison
| Technique | Advantages | Disadvantages |
|---|---|---|
| Cornrow Method | Stable base | Scalp tension |
| Track Method | Flexibility | Less stability |
| Hybrid Method | Balance of both methods | May be more time-consuming |
Table 2: Closure Types Comparison
| Closure Type | Advantages | Disadvantages |
|---|---|---|
| Lace Closure | Breathable | More delicate |
| Silk Closure | Durable | Less breathable |
Table 3: Closure Density Guide
| Density | Description |
|---|---|
| 100% | Thickest, suitable for curly or coarse hair |
| 130% | Medium density, ideal for most hair types |
| 150% | Fuller, recommended for thin or fine hair |
| 200% | Very full, suitable for dramatic volume |
Table 4: Closure Size Guide
| Size (inches) | Recommended Head Shape |
|---|---|
| 4×4 | Small to medium |
| 5×5 | Medium to large |
| 6×6 | Large to extra large |
