Introduction
Closure sew-ins have become increasingly popular among individuals seeking a versatile and protective hair styling option. With its ability to seamlessly blend with natural hair, create a natural-looking hairline, and protect the hair from damage, closure sew-ins offer a multitude of benefits.

Benefits of Closure Sew-Ins
According to the American Hair Loss Association, over 35 million women in the United States experience female-pattern hair loss. Closure sew-ins provide an effective solution for those experiencing hair thinning, breakage, or other hair-related concerns.
1. Protective Styling: Closure sew-ins act as a barrier between natural hair and harsh elements, such as heat, chemicals, and mechanical manipulation. By keeping the hair tucked away, it reduces exposure to damage and promotes hair growth.
2. Versatile Styling: Closure sew-ins offer endless styling possibilities. From sleek ponytails and voluminous curls to intricate braids and updos, closure sew-ins can be customized to complement any face shape and hair texture.
3. Time-Saving Convenience: Compared to traditional weaves or other protective styles, closure sew-ins are relatively quick and easy to install. This saves valuable time and allows for effortless style maintenance.
Choosing a Closure Sew-In
1. Determine Your Hair Type: The type of hair you wear will influence the closure sew-in technique used. For example, coarse hair may require a more secure weave pattern, while fine hair may benefit from a gentler approach.
2. Select a Closure: Closures come in a variety of textures, colors, and sizes. Choose a closure that closely matches your natural hair texture and color to achieve a seamless blend.
3. Consider Your Lifestyle: If you lead an active lifestyle or frequently engage in sports, you may need a more durable weave pattern to prevent the closure from slipping or loosening.
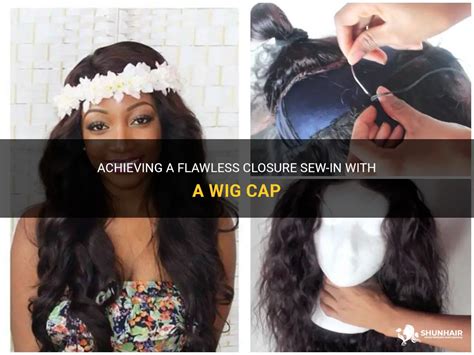
Closure Sew-In Installation
1. Preparation: Wash and condition your natural hair. Apply a leave-in conditioner or hair moisturizer to prepare it for braiding.
2. Braiding: Divide the natural hair into small sections and braid them down. Use a fine-tooth comb to smooth the braids and create a flat surface for the closure.
3. Closure Placement: Place the closure on the front of the braided hair and secure it with clips. Ensure that the closure is positioned correctly and blends seamlessly with the natural hairline.
4. Sewing: Use a curved needle and thread to sew the closure to the braids. Start at the center and work your way around the edges, making sure to secure the closure tightly.
Maintenance and Removal
1. Regular Cleaning: Wash the closure sew-in regularly to remove product buildup and dirt. Use a gentle shampoo and conditioner specifically designed for weaves.
2. Deep Conditioning: Apply a deep conditioning treatment once a week to nourish and moisturize the natural hair underneath the closure.
3. Edge Care: Pay special attention to the edges around the closure. Use an edge control product to keep the hair in place and prevent breakage.
4. Removal: Have a professional stylist remove the closure sew-in when it’s time to take it out. Attempting to remove it yourself can lead to damage to the natural hair.
Tips and Tricks
1. Choose a Skilled Stylist: The skill of the stylist performing the closure sew-in can significantly impact the longevity and quality of the style.
2. Use Quality Products: Invest in high-quality weave hair, closure, and hair care products to ensure optimal results.
3. Moisturize Regularly: Keep the natural hair underneath the closure hydrated by regularly applying hair oils, serums, or leave-in conditioners.
4. Avoid Heat Damage: Limit the use of heat styling tools on the closure and natural hair. Heat can weaken the hair and cause breakage.
Conclusion
Closure sew-ins are a versatile and protective hair styling option that can enhance the beauty and confidence of individuals. By understanding the benefits, choosing the right closure, and maintaining it properly, you can achieve flawless sew-in weaves that complement your personal style and protect your natural hair.
Additional Information
1. Market Statistics: The global hair extension market is projected to reach $12.6 billion by 2026, with closure sew-ins accounting for a significant portion of this growth. (Source: Allied Market Research)
2. Customer Testimonials: “Closure sew-ins have transformed my hair journey. They protect my natural hair from damage and allow me to experiment with different hairstyles without compromising the health of my scalp.” – Ashley, satisfied customer
3. Related Articles:
- The Ultimate Guide to Protective Hairstyles
- Tips for Maintaining a Closure Sew-In
- How to Choose the Right Closure for Your Sew-In
Tables
Table 1: Closure Types
| Type | Description |
|---|---|
| Lace Closure | Sheer fabric with pre-attached hair, creating a natural hairline |
| Silk Closure | Silky material with hand-tied hair, providing a more natural appearance |
| Mono Closure | Strong fabric with stitched-in hair, offering durability and versatility |
Table 2: Protective Styling Benefits
| Benefit | Explanation |
|---|---|
| Reduces Hair Breakage | Prevents mechanical damage from brushing, combing, and styling |
| Promotes Hair Growth | Shields hair from harsh elements, creating an optimal environment for healthy growth |
| Preserves Natural Texture | Protects hair from humidity, chemicals, and heat, maintaining its natural curl pattern |
Table 3: Considerations for Choosing a Closure
| Factor | Importance |
|---|---|
| Hair Texture | Match the closure texture to your natural hair texture for a seamless blend |
| Hair Color | Choose a closure color that closely matches your natural hair color to avoid visible demarcation |
| Size | Select a closure size that provides adequate coverage for your desired style |
Table 4: Maintenance Tips
| Tip | Frequency |
|---|---|
| Wash Closure Sew-In | Every 7-10 days |
| Apply Leave-In Conditioner | Daily or as needed |
| Deep Condition Natural Hair | Once a week |
| Check for Tightness | Regularly to ensure the closure is secure |