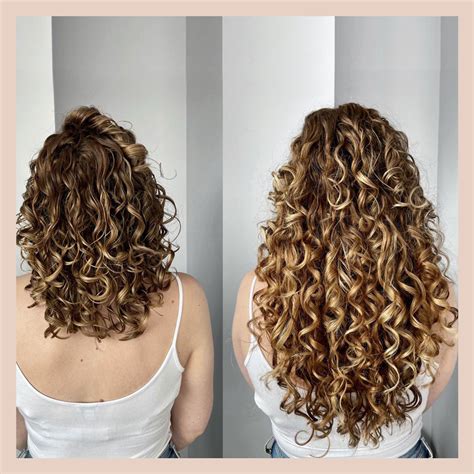
Unveiling the world of curly clip-in extensions, a hair revolution that empowers you with endless styling possibilities. Embrace the allure of voluminous curls, cascading waves, and boundless creativity, all at your fingertips.
The Pain Points: Addressing Hair Woes
Thinning Hair: Restore volume and fullness, transforming lifeless locks into a vibrant cascade of curls.
Color Experimentation: Clip-in extensions allow you to explore bold colors and highlights without committing to permanent dyes.
Instant Length: Achieve the luscious, flowing hair you’ve always longed for in an instant.
Versatile Styling: Create an array of hairstyles, from elegant chignons to carefree beach waves, effortlessly.
The Motivation: Empowering Hair Transformations
Self-expression: Embrace your individuality and express your unique style.
Confidence Boost: Radiate confidence with luscious, voluminous hair that turns heads.
Time-saving Convenience: Enjoy instant transformations without the hassle of salon appointments.
Damage Prevention: Avoid the damaging effects of heat styling and chemical treatments on your natural hair.
4 Essential Tables for Curly Clip-In Extension Selection
Hair Types
Recommended Clip-In Texture
fine
Wavy or light curly
medium
Medium curly
thick
Tight curly or kinky
Length
Ideal for
14″-16″
Shoulder-length styles
18″-20″
Mid-length styles
22″-24″
Long, flowing styles
Color
Options
Natural
Match your natural hair color
Highlights
Add depth and dimension
Ombre
Create a gradual transition of colors
Quantity
Ideal for
1-2 packs
Adding volume and length
3-4 packs
Creating maximum volume and thickness
5+ packs
Achieving dramatic transformations
Tips and Tricks for Flawless Installation
Section Your Hair: Divide your hair into top and bottom sections to create a natural-looking blend.
Backcomb and Tease: Gently backcomb or tease your natural hair at the roots to provide a secure grip for the clip-ins.
Clip Securely: Attach the clip-ins firmly to your own hair, ensuring they sit flush against your head.
Blend Seamlessly: Use a hairbrush or fingers to blend the clip-ins with your natural hair, concealing any visible tracks.
Step-by-Step Guide to Curly Clip-In Extravaganza
Prepare Your Hair: Wash and condition your hair, then blow dry or air dry it completely.
Section and Tease: Section your hair and tease the roots to provide a base for the extensions.
Install Clip-Ins: Start by clipping in the top row at the back of your head, followed by the middle and bottom rows.
Securely Anchor: Push down on each clip to ensure it is securely fastened to your hair.
Conceal Tracks: Gently brush or finger-comb your hair to blend the extensions seamlessly.
Style: Experiment with different hairstyles using heat styling tools, bobby pins, and hairspray.
Applications That Ignite Creativity
Beyond the traditional uses of volumizing and lengthening, curly clip-in extensions inspire an array of innovative applications that defy expectations:
Halo Highlights: Add illuminating streaks of color to your crown without touching your roots.
Transformation Twists: Introduce vibrant twists of color throughout your hair for a pop of personality.
Double Dutch Braids: Incorporate extensions into elaborate braids for a stunning and voluminous look.
Pigtail Play: Create playful pigtails with extensions for a touch of youthful exuberance.
Conclusion: Your Curly Transformation Awaits
Unleash the transformative power of curly clip-in extensions. With a myriad of textures, lengths, and colors to choose from, you can tailor your look to suit your every mood. Embrace the endless possibilities while reveling in the confidence that comes with luscious, voluminous hair.