Introduction
Human hair extensions are a popular choice for those seeking a way to enhance their locks and achieve the coveted long and voluminous mane. Among the various types of hair extensions, sew-in extensions stand out for their ability to provide a secure, long-lasting, and natural-looking transformation. This article explores the benefits, types, and step-by-step process of sew-in human hair extensions.

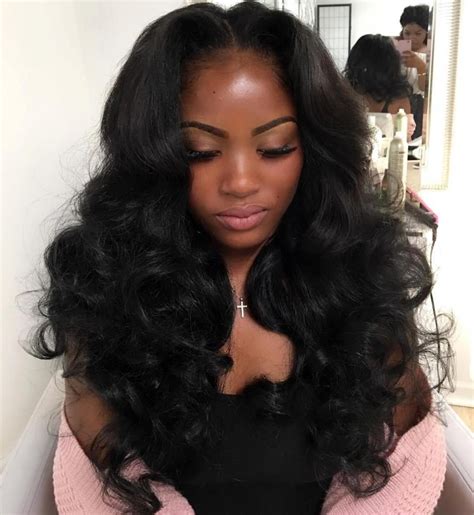
Benefits of Sew-In Extensions
- Long-lasting: Sew-in extensions can last for up to 8 weeks, making them a more permanent solution compared to clip-in or tape-in extensions.
- Versatile: Sew-in extensions can be customized to match hair type, texture, and length, providing countless styling possibilities.
- Secure hold: The sewing technique ensures a firm attachment to the natural hair, eliminating the risk of slippage or detachment.
- Minimal damage: Sew-in extensions are considered less damaging than other methods, as they do not involve the use of heat or harsh chemicals.
- Sleek appearance: The extensions are sewn close to the scalp, creating a seamless blend that minimizes visibility.
Types of Sew-In Extensions
- Machine-wefted: Pre-wefted tracks of hair are sewn directly onto the natural hair using a sewing machine.
- Hand-tied: Individual strands of hair are hand-tied to the natural hair using a thread and needle, resulting in a more flexible and natural-looking effect.
- Micro-link: Small metal or silicone beads are used to attach the extensions to the natural hair, providing a secure and low-profile hold.
- Beaded row: Similar to micro-link, but uses a thin, clear thread to secure the extensions to the natural hair.
Step-by-Step Process of Sew-In Extensions
1. Consultation and Hair Preparation:
- Consult with a professional hair stylist to determine the type, length, and color of extensions suitable for your hair.
- Wash and condition your hair thoroughly to remove any dirt, oil, or product buildup.
2. Sectioning:
- Divide the hair into small sections, typically 2-4 inches wide.
- Secure the sections with clips or ties to keep them out of the way.
3. Sewing:
- Using a curved or cornrow needle, thread the extension onto the natural hair.
- Sew the extension securely to the natural hair, starting at the base and working your way towards the tip.
- Repeat the process for all the desired sections.
4. Trimming and Blending:
- Trim any excess extension hair to match the length of the natural hair.
- Blend the extensions and natural hair together using scissors or a razor to create a seamless transition.
5. Finishing:
- Style the extensions as desired using heat styling tools or products.
- Apply a shine spray or serum to enhance the luster and reduce frizz.
Customer Needs and Wants
- Long and voluminous hair: Sew-in extensions fulfill the desire for long, thick, and luxurious locks.
- Natural-looking results: Clients seek extensions that blend seamlessly with their natural hair, creating a cohesive and realistic look.
- Secure hold: Customers want extensions that stay in place without slippage or shedding.
- Minimal damage: Clients are concerned about the potential damage to their natural hair and prefer methods that minimize breakage or thinning.
- Multiple styling options: The versatility of sew-in extensions allows customers to experiment with different styles, colors, and lengths.
Conclusion
Human hair extensions sew-in provides a secure, long-lasting, and natural-looking solution for those seeking to enhance their hair volume and style. With proper care and maintenance, sew-in extensions can last for several weeks, offering endless possibilities for experimentation and self-expression. By understanding the customer’s needs and wants, hair professionals can effectively deliver the transformational results desired through this versatile and satisfying technique.