Unlock the art of seamless closures with our comprehensive guide, revealing 7 essential techniques for achieving natural-looking, long-lasting results. From selecting the right closure to perfecting the installation, we’ll empower you with the knowledge and skills to elevate your hair game.

What is a Closure Sew In?
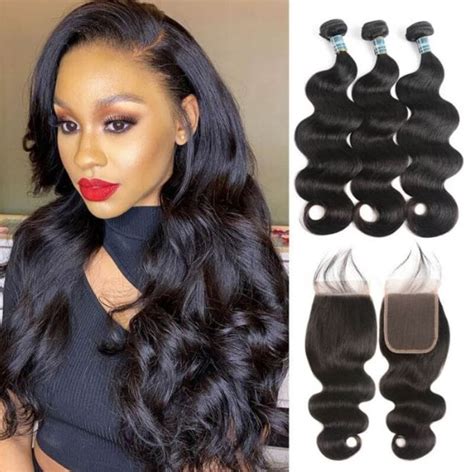
A closure sew in is a hair extension technique that involves sewing a hair closure (a small piece of hair with an attached scalp) onto natural hair to create a natural-looking hairline. This method allows for versatile styling options and protects the natural hair from damage caused by wigs or glues.
Types of Closures
1. Lace Closures:
Lace closures are made from a sheer lace material that blends seamlessly with the scalp. They are lightweight and breathable, making them comfortable to wear for extended periods.
2. Silk Closures:
Silk closures are crafted from 100% silk, offering a luxurious and natural look. They are more durable than lace closures but may require additional maintenance.
3. Mono Closures:
Mono closures are made from a monofilament net that creates the illusion of a natural scalp. They are incredibly lightweight and allow for versatile styling.
Choosing the Right Closure
1. Hair Texture:
Match the texture of the closure to your natural hair for a seamless blend. If your hair is naturally curly, opt for a closure with textured bundles.
2. Hair Length:
Consider the desired length of your hair when selecting a closure. The closure should be long enough to cover your natural hair and provide a natural hairline.
3. Hair Density:
Choose a closure with a density that complements your natural hair. A light density closure will blend well with fine hair, while a heavy density closure will provide volume for thicker hair.
Preparation and Installation
1. Wash and Condition:
Wash and condition both your natural hair and the closure to remove any product buildup or impurities. Allow both to air dry completely.
2. Braid and Cornrow:
Braid or cornrow your natural hair to create a smooth base for the closure. This will help secure the closure and prevent it from slipping.
3. Position the Closure:
Position the closure on the braided hair, aligning the hairline with your natural hairline. Use clips or bobby pins to hold it in place.
4. Sew the Closure:
Using a needle and thread, sew the closure onto the braids, taking small, even stitches. Start at the front and work your way back, ensuring a secure attachment.
Tips and Tricks
1. Use Invisible Thread:
Invisible thread will blend seamlessly with the scalp for a natural-looking result.
2. Double-Knot Your Stitches:
Double-knotting your stitches will ensure a strong hold that will last for weeks.
3. Blend with Baby Hair:
Add baby hair around the perimeter of the closure to create a realistic hairline.
4. Shampoo and Condition Regularly:
Shampoo and condition your closure and natural hair regularly to maintain a healthy scalp and hair.
Common Mistakes to Avoid
1. Using the Wrong Closure:
Choosing a closure that does not match your hair texture or density will result in an unnatural look.
2. Sewing Too Tightly:
Sewing the closure too tightly can damage your natural hair and cause scalp irritation.
3. Not Double-Knotting Stitches:
Single stitches can come loose over time, causing the closure to slip or fall out.
4. Ignoring Maintenance:
Neglecting to shampoo and condition your closure and natural hair can lead to tangles, matting, and scalp problems.
Step-by-Step Approach
1. Prepare:
Wash, condition, and dry both your natural hair and the closure.
2. Braid and Cornrow:
Braid or cornrow your natural hair to create a base for the closure.
3. Position the Closure:
Align the closure’s hairline with your natural hairline and secure it with clips.
4. Sew the Closure:
Using invisible thread, sew the closure onto the braids with small, even stitches. Double-knot each stitch for security.
5. Finish:
Trim any excess thread and blend the closure with baby hair for a natural look.
Maintenance and Care
1. Washing:
Shampoo and condition your closure and natural hair as often as necessary. Avoid using clarifying shampoos as they can weaken the thread.
2. Drying:
Air dry your closure and natural hair after washing. Avoid using heat styling tools directly on the closure.
3. Styling:
Avoid pulling or combing the closure excessively. Use a wide-tooth comb to gently detangle any knots.
4. Retightening:
The closure may need to be retightened over time as the natural hair grows. Visit a professional stylist for proper maintenance.
Creative New Application Ideas
1. Halo Closures:
Create the illusion of a halo with a closure sewn onto a wire or band. This technique offers a quick and convenient option for adding volume and length.
2. Ponytail Extensions:
Attach a closure to a ponytail extension for an effortless and chic updo. This method allows for a sleek and polished look without the need for glue or adhesives.
3. Bang Extensions:
Add bangs without committing to a permanent cut by sewing a closure with textured bangs onto your natural hair. This technique provides versatility and allows for easy styling.
Benefits of Closure Sew Ins
1. Natural and Seamless Look:
Closures create a natural-looking hairline that seamlessly blends with your own hair.
2. Hair Protection:
Closures protect natural hair from damage caused by wigs or glues, allowing it to grow and flourish.
3. Versatility:
Closures offer versatility, allowing for a wide range of styling options from braids to buns and everything in between.
4. Long-Lasting Wear:
When properly installed, closures can last for several weeks, providing continuous wear without the need for daily hair maintenance.
Table 1: Closure Types and Characteristics
| Closure Type | Material | Breathability | Durability |
|---|---|---|---|
| Lace Closure | Sheer lace | High | Medium |
| Silk Closure | 100% silk | Low | High |
| Mono Closure | Monofilament net | High | Medium |
Table 2: Closure Density Options
| Density | Hair Weight per Square Inch | Suitable Hair Type |
|---|---|---|
| Light Density | 1.2-1.5 oz | Fine to medium hair |
| Medium Density | 1.6-2.0 oz | Medium to thick hair |
| Heavy Density | 2.1-2.5 oz | Thick and coarse hair |
Table 3: Tools and Materials for Closure Sew In Installation
| Tool | Purpose |
|---|---|
| Hair Closure | Provides a natural hairlin |
| Needle and Thread | Secures the closure to the natural hair |
| Braiding Comb | Creates a smooth base for the closure |
| Clips or Bobby Pins | Holds the closure in place |
| Invisible Thread | Conceals stitches for a natural appearance |
Table 4: Maintenance Schedule for Closure Sew Ins
| Frequency | Task |
|---|---|
| Weekly | Shampoo and condition closure and natural hair |
| Monthly | Retighten stitches if necessary |
| Every 4-6 weeks | Visit a professional stylist for deep cleaning and maintenance |