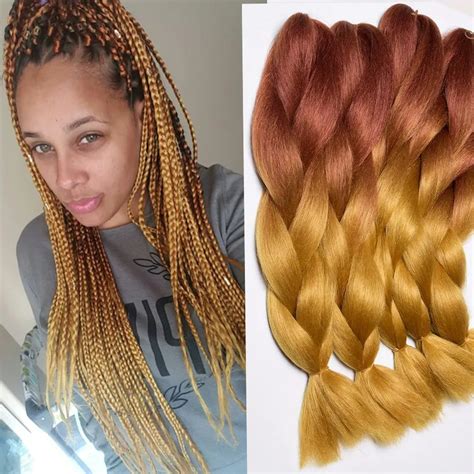
With synthetic hair extensions, you can effortlessly elevate your hair game, adding volume, length, and color in an instant. And when it comes to styling synthetic hair extensions, braiding reigns supreme. This versatile technique offers endless possibilities, from sleek cornrows to ethereal updos. In this comprehensive guide, we’ll delve into 4 easy synthetic hair extensions braiding techniques, empowering you to transform your tresses like a pro.

Braiding Synthetic Hair Extensions for Every Occasion
Synthetic hair extensions are a versatile addition to your beauty arsenal, empowering you to experiment with various hairstyles without damaging your natural hair. Here are a few occasions where braiding synthetic hair extensions can elevate your look:
- Everyday Wear: Effortlessly enhance your daily style with subtle braids or intricate patterns.
- Formal Events: Create elegant updos or half-up hairstyles that exude sophistication.
- Festivals: Embrace bohemian vibes with loose, flowing braids adorned with beads or charms.
- Workouts: Secure your hair with practical and stylish braids that won’t hinder your performance.
Technique 1: Classic 3-Strand Braid
Skill Level: Beginner
Time: 10-15 minutes
The classic 3-strand braid is a timeless technique that works flawlessly with synthetic hair extensions.
Step 1: Section and Clip
Part your hair into three equal sections and clip up the sections you’re not currently working on.
Step 2: Start Braiding
Take the right section and cross it over the middle section. Then, take the left section and cross it over the new middle section.
Step 3: Continue Braiding
Repeat Step 2, alternating between right and left sections until you reach the nape of your neck.
Step 4: Secure the Braid
Tie the end of the braid with a hair elastic or ribbon.
Technique 2: Dutch Braid
Skill Level: Intermediate
Time: 15-20 minutes
The Dutch braid, similar to the French braid but with an inverted design, adds a voluminous and intricate element to your hair.
Step 1: Section and Clip
Follow Step 1 from the classic 3-strand braid technique.
Step 2: Start Braiding
Take the left section and cross it under the middle section. Then, take the right section and cross it under the new middle section.
Step 3: Continue Braiding
Repeat Step 2, alternating between left and right sections until you reach the nape of your neck.
Step 4: Secure the Braid
Tie the end of the braid with a hair elastic or ribbon.
Technique 3: Fishtail Braid
Skill Level: Intermediate
Time: 20-25 minutes
The fishtail braid, with its intricate overlapping design, creates a delicate and ethereal look.
Step 1: Section and Clip
Follow Step 1 from the classic 3-strand braid technique.
Step 2: Create Sections
Take a small section from the outside of the left section and cross it over to the inside of the right section.
Step 3: Repeat on the Other Side
Take a small section from the outside of the right section and cross it over to the inside of the left section.
Step 4: Continue Braiding
Repeat Steps 2 and 3, alternating sides until you reach the nape of your neck.
Step 5: Secure the Braid
Tie the end of the braid with a hair elastic or ribbon.
Technique 4: Waterfall Braid
Skill Level: Advanced
Time: 25-30 minutes
The waterfall braid, with its cascading effect, creates a romantic and flowy look.
Step 1: Section and Clip
Part your hair into two sections: the top section and the bottom section. Clip up the bottom section.
Step 2: Take a Section and Braid
Take a small section from the top of the left side of the head and braid it for about an inch.
Step 3: Drop the Section and Pick Up a New One
Drop the section you just braided and pick up a new section from the bottom of the head.
Step 4: Continue the Waterfall
Add the new section to the braid and continue braiding for about an inch.
Step 5: Repeat the Process
Drop the section and pick up a new one from the bottom of the head. Repeat until reaching the opposite side of the head.
Step 6: Secure the Braid
Tie the braid behind the ear or clip it in place.
FAQs
1. What types of synthetic hair extensions are best for braiding?
Kanekalon, Toyokalon, and high-temperature fiber extensions are popular choices for braiding due to their heat resistance and durability.
2. How long do synthetic hair extensions last if braided?
Properly cared for synthetic hair extensions can last up to 3-6 months or longer when braided.
3. Can I wash synthetic hair extensions that have been braided?
Yes, you can wash braided synthetic hair extensions with a mild shampoo and lukewarm water. Avoid using conditioner.
4. How do I remove synthetic hair extensions that have been braided?
Cut the braid into smaller sections and carefully work each section out of your hair, starting from the bottom. Use a wide-tooth comb to avoid snagging.
5. Can I color synthetic hair extensions after they have been braided?
It is not recommended to color synthetic hair extensions after they have been braided as it could damage the extensions.
6. How often should I re-tighten braided synthetic hair extensions?
Re-tightening is recommended every 2-3 weeks to prevent the braids from loosening.
Conclusion
Braiding synthetic hair extensions is a versatile and creative way to elevate your hairstyles. With the techniques outlined in this guide, you can effortlessly create stunning braids that enhance your look effortlessly. Remember to choose high-quality synthetic hair extensions, care for them properly, and experiment with different braiding styles to create endless possibilities.
