1. Shimmering Snowflakes
Take a snowy hue and create delicate snowflakes using a fine-tip brush. Add tiny dots for added dimension, and seal with a glossy top coat for a magical sparkle.

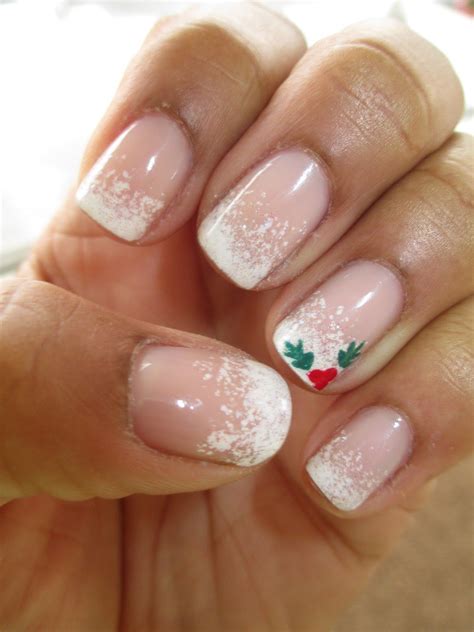
2. Festive French Tip
Elevate the classic French manicure by painting the tips in a deep red or emerald green. Use a gold or silver glitter polish to create a glamorous accent stripe.
3. Candy Cane Stripes
Channel the iconic Christmas treat with alternating red and white stripes. Use nail art tape for clean lines, or simply freehand it with a steady hand.
4. Reindeer Silhouettes
Paint a black silhouette of a reindeer on a white background. Add a tiny red nose and antlers for a whimsical touch.
5. Holographic Holidays
Create a festive iridescent effect by applying a holographic polish. The multidimensional shimmer will reflect the holiday lights and add a touch of magic.
6. Winter Wonderland
Transform your nails into a winter wonderland with a matte white base. Use a fine-tip brush to create tiny trees, snowmen, and other wintery scenes.
7. Twinkling Lights
Capture the festive spirit with twinkling lights. Paint tiny dots in a light shade and add a dab of clear nail polish for a dimensional effect.
- Effortless: These designs are straightforward and easy to create, even for beginners.
- Time-Saving: They take minimal time to complete, freeing up your holiday schedule.
- Versatile: They complement any festive outfit or occasion.
- Budget-Friendly: The materials required are affordable and readily available.
- Overcrowding: Keep designs simple to avoid a cluttered look.
- Poor Prep: Ensure nails are clean and dry before painting for optimal adhesion.
- Uneven Lines: Use nail art tape or a steady hand to create precise lines and shapes.
- Insufficient Drying Time: Allow each coat to dry completely before applying the next one to prevent smudging.
Pros:
- Easy to create
- Time-efficient
- Versatile
- Budget-friendly
Cons:
- May lack the sophistication of more elaborate designs
- Not suitable for all festive occasions (e.g., formal parties)
| Color | Description |
|---|---|
| Red | Classic Christmas hue, associated with Santa Claus and poinsettias |
| Green | Represents Christmas trees, holly, and mistletoe |
| Gold | Evokes warmth, luxury, and the festive season |
| Silver | Adds a touch of sophistication and shimmer |
| White | Symbolizes snow, purity, and the wintery wonderland |
| Tool | Use |
|---|---|
| Nail Art Brush | Create precise lines and details |
| Nail Art Tape | Achieve clean and even stripes |
| Dotting Tool | Make dots for snowflakes, reindeer noses, etc. |
| Glitter | Add a festive sparkle |
| Top Coat | Seal and protect designs |
| Tip | Result |
|---|---|
| Use a base coat | Strengthens nails and prevents staining |
| Apply thin coats | Multiple thin coats are better than one thick coat |
| Allow ample drying time | Prevents smudging and chipping |
| Use a top coat | Seals in the design and protects it from wear and tear |
| Design | Inspiration |
|---|---|
| Candy Cane Stripes | Iconic Christmas treat |
| Winter Wonderland | Snowy landscapes and wintery elements |
| Twinkling Lights | Festive holiday lights |
| Christmas Tree | Symbol of Christmas spirit |
| Reindeer | Beloved holiday character |
These simple Christmas nail ideas offer an effortless way to spread holiday cheer. Whether you prefer shimmering snowflakes or festive French tips, these designs will perfectly complement your festive attire. Remember to follow the tips and avoid common mistakes for long-lasting, eye-catching nails that will add a touch of magic to your Christmas celebrations.