Introduction

Apex Legends, the adrenaline-pumping battle royale, has ignited a surge in popularity for its iconic weaponry. From the deadly R-301 Carbine to the devastating Peacekeeper Shotgun, these guns have become the symbols of survival and victory in the Outlands.
For passionate fans and skilled cosplayers, replicating these apex guns in real life is an irresistible challenge. This comprehensive guide will walk you through every step of the cosplay process, ensuring that your apex guns come to life with the utmost authenticity and attention to detail.
Materials and Tools
Essential Materials:
- EVA foam
- PVC pipes
- Craft foam
- Wood
- Screws, nails, and glue
- Paint (acrylics or spray paint)
Essential Tools:
- Utility knife or X-Acto knife
- Sandpaper
- Ruler or measuring tape
- Heat gun or hair dryer
- Dremel tool (optional)
Safety Precautions:
- Always wear gloves and safety glasses when using sharp tools or heat.
- Work in a well-ventilated area.
- Test your paints and materials on a scrap piece before applying them to the cosplay.
Step-by-Step Guide to Crafting Apex Guns
Step 1: Reference and Planning
- Gather high-quality reference images of the apex gun you want to cosplay.
- Break down the gun into its individual components (barrel, receiver, stock, etc.).
- Sketch out a rough design plan, taking into account proportions and details.
Step 2: Crafting the Base Structure
- Use EVA foam as the primary material for the base structure of your gun.
- Cut out the shapes and dimensions of each component using a utility knife or X-Acto knife.
- Glue or screw the pieces together using craft foam as reinforcement.
Step 3: Adding Details and Refinement
- Use craft foam or wood to create smaller details, such as grips, barrels, and sights.
- Sand and carve the edges for a realistic and weathered look.
- Use a Dremel tool for intricate details if needed.
Step 4: Painting
- Prime the gun with several coats of acrylic paint or spray paint.
- Apply a base coat of color and let it dry.
- Add highlights, shading, and wear and tear effects using dry brushing, washes, or sponges.
Step 5: Assembly and Finishing
- Assemble all the components of the gun.
- Reinforce any weak points with screws or nails.
- Add finishing touches, such as weathering effects, decals, or lighting.
Keyword-Rich Headings
Table of Contents
Introduction
Materials and Tools
Step-by-Step Guide to Crafting Apex Guns
Apex Guns Cosplay Gallery
Tips for Beginners
Advanced Techniques
Resources
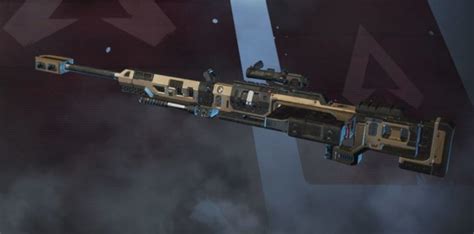
Showcase a collection of stunning apex guns cosplays, showcasing the creativity and skill of the cosplayers.
- Start with a simple gun: Choose an apex gun with a manageable design and few complex details.
- Use lightweight materials: EVA foam and craft foam are great options for beginners as they are lightweight and easy to work with.
- Don’t be afraid to experiment: Even the most skilled cosplayers make mistakes. Embrace the learning process and experiment with different techniques.
- 3D Printing: Use 3D printing to create intricate details or complex shapes.
- Prop Making: Learn basic prop making techniques to create realistic accessories, such as ammo clips and holsters.
- Electronics: Integrate LEDs or sound effects into your apex gun for added realism.
Crafting apex guns cosplay requires a combination of creativity, patience, and attention to detail. By following the steps outlined in this guide and embracing the tips and techniques provided, you can create stunning and authentic representations of your favorite weapons from the Outlands. Whether you’re a seasoned cosplayer or just starting out, remember that the journey is as rewarding as the final product.