Closure Sew In: The Ultimate Guide to Achieving Natural-Looking, Long-Lasting Hair Extensions
Introduction
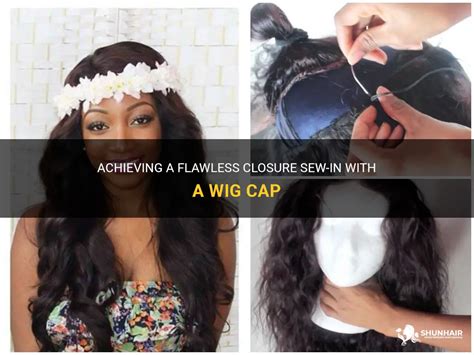
Closure sew ins have become increasingly popular among women seeking a versatile and low-maintenance method to enhance the length and volume of their hair. This technique involves sewing a lace or silk closure to the natural hair, creating a seamless transition between the extensions and the scalp. In this comprehensive guide, we will explore the intricacies of closure sew ins, including their benefits, considerations, and the step-by-step process for achieving flawless results.
Benefits of Closure Sew Ins
Natural Appearance: Closure sew ins blend seamlessly with the natural hair, resulting in a natural-looking and undetectable extension.
Versatile Styling: Extensions can be styled and dyed just like natural hair, allowing for endless styling options.
Long-Lasting: Closure sew ins can last for up to 3-6 weeks, depending on the maintenance and care provided.
Damage-Free: The technique does not put stress on the natural hair, making it an ideal choice for those looking to protect the health of their hair.
Considerations for Closure Sew Ins
Hair Type and Texture: The success of a closure sew in depends on the compatibility between the extension hair and the natural hair. Consult a professional stylist to determine the most suitable type of hair and texture for your specific needs.
Density and Length: The density and length of the extensions should complement the natural hair to achieve a balanced and flattering look.
Sewing Method: Various sewing methods are available, each with its own advantages. Discuss the best option with your stylist based on the desired outcome and hair type.
Maintenance: Regular maintenance, including washing, conditioning, and styling, is essential to extend the longevity of the closure sew in and maintain its optimal condition.
Step-by-Step Process for Closure Sew Ins
Preparation
Wash and deep condition the natural hair to remove any dirt or buildup.
Create a protective style, such as braids or twists, to protect the natural hair from tension.
Part the hair into sections and apply a leave-in conditioner to provide moisture and protection.
Sewing the Closure
Position the closure at the desired location on the scalp.
Secure the closure using a sewing needle and thread. Start by sewing around the perimeter and then fill in the center sections.
Use a tight, consistent stitch pattern to ensure a secure and durable attachment.
Blending the Extensions
Wash and style the extensions to match the texture and color of the natural hair.
Section the extensions and start sewing them to the braided or twisted natural hair.
Use a small needle and thread to create tiny, secure stitches.
Layer the extensions to achieve the desired volume and length.
Styling and Finishing
Remove the protective style from the natural hair.
Blend the extensions into the natural hair using styling products, such as mousse or gel.
Cut and style the hair as desired to create a seamless and natural look.
Effective Strategies for Flawless Closure Sew Ins
Proper Consultation: Consult with an experienced stylist to determine the most suitable hair type, length, and density for your needs.
Meticulous Preparation: Ensure the natural hair is adequately washed, conditioned, and styled to provide a solid foundation for the extensions.
Precise Sewing Technique: Use a sharp needle and strong thread to achieve a secure and durable attachment. Avoid tension that can damage the natural hair.
Blending and Styling: Seamlessly blend the extensions into the natural hair using appropriate styling techniques and products.
Maintenance and Care: Regularly wash, condition, and style the closure sew in to maintain its condition and longevity. Avoid excessive heat styling and excessive brushing.
Tips and Tricks for Closure Sew Ins
Use a Moisture-Wicking Closure: Opt for a lace or silk closure that wicks away moisture to prevent scalp irritation.
Choose Heat-Resistant Hair: Extensions made from heat-resistant fibers can be styled with hot tools without causing damage.
Consider a U-Part Closure: U-part closures allow for easier access to the scalp for shampooing and conditioning.
Get Regular Touch-Ups: Schedule regular maintenance appointments to tighten the stitches and refresh the blend between the extensions and natural hair.
Invest in a Satin Bonnet: Wear a satin bonnet at night to reduce friction and preserve the integrity of the closure sew in.
Why Closure Sew Ins Matter
Confidence Boost: Enhance your self-esteem and confidence with thicker, longer, and more voluminous hair.
Protective Styling: Closure sew ins can protect the natural hair from damage caused by heat styling, chemical treatments, and environmental factors.
Versatility: Experiment with different hairstyles, colors, and lengths without committing to permanent changes.
Time-Saving: Save time on styling and achieve salon-quality results at home.
Scalp Protection: Closure sew ins protect the scalp from sun damage and reduce scalp irritation.
Table 1: Closure Sew In Maintenance Tips
Frequency
Task
Weekly
Wash and condition the hair
Bi-weekly
Deep condition the hair
Monthly
Tighten the stitches
As needed
Touch up the blend
Table 2: Comparison of Sewing Methods for Closure Sew Ins
Method
Advantages
Disadvantages
Flat Track Method
Strong hold, even distribution of weight
Less versatile for styling
Cornrow Method
Quick and easy to install, versatile for styling
Can be uncomfortable for some
Stitch Braid Method
Durable and secure, allows for easy maintenance
Time-consuming to install
Table 3: Benefits of Closure Sew Ins
Benefit
Description
Natural Appearance
Seamless transition between extensions and natural hair
Versatile Styling
Endless styling options to match any desired look
Long-Lasting
Can last for up to 3-6 weeks with proper maintenance
Damage-Free
Protective technique that does not put stress on natural hair
Table 4: Tips for Choosing a Closure Sew In Stylist
Factor
Considerations
Experience
Look for a stylist with at least 2 years of experience in closure sew ins.
Portfolio
Examine the stylist’s portfolio to assess their technical skills and artistic vision.
Referrals
Ask for recommendations from friends or family members who have had successful closure sew in experiences.
Credentials
Ensure the stylist holds relevant certifications and has undergone proper training.
Conclusion
Closure sew ins offer a transformative and versatile solution for achieving long-lasting, natural-looking hair extensions. By carefully considering the factors discussed in this guide, you can embark on the journey to enhance your hair and elevate your confidence. Remember, regular maintenance, proper styling techniques, and the right stylist are essential to maximizing the benefits and longevity of your closure sew in. Embrace the allure of beautiful, voluminous hair with this revolutionary hair enhancement method that empowers you to express your unique style and unleash your inner beauty.