Table of Contents
- Introduction: The Allure of Balayage & Highlights
- Balayage vs. Highlights: Defining the Differences
- Benefits & Applications of Balayage & Highlights
- How to Choose the Perfect Balayage or Highlights for You
- Common Mistakes to Avoid When Getting Balayage or Highlights
- Step-by-Step Guide to Achieving Balayage & Highlights at Home
- Frequently Asked Questions
- Additional Resources
Introduction: The Allure of Balayage & Highlights
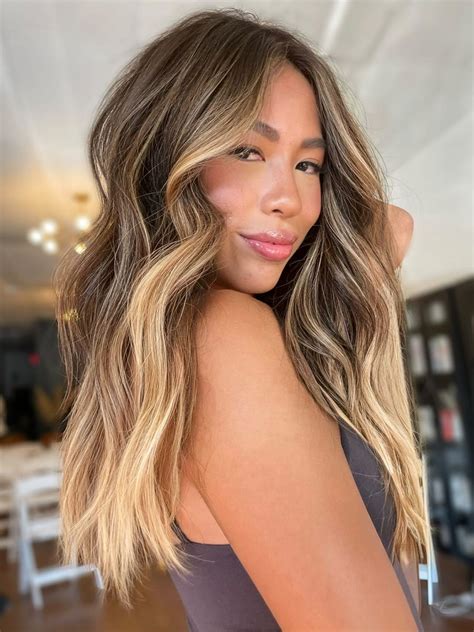
Balayage and highlights are two of the most popular hair coloring techniques today, offering a versatile range of options to enhance your look. Balayage creates a natural, sun-kissed effect, while highlights add depth and dimension with strategically placed strands of lighter color.

Balayage vs. Highlights: Defining the Differences
| Feature | Balayage | Highlights |
|---|---|---|
| Technique | Freehand painting | Foiling or caping |
| Application | Root to tip | Targeted sections |
| Effect | Gradual color transition | Contrasting strands |
| Maintenance | Less frequent | More frequent |
Benefits & Applications of Balayage & Highlights
Benefits:
- Create a unique, customized look
- Enhance natural hair color and tone
- Add depth and dimension to fine hair
- Camouflage gray hair
- Provide a low-maintenance alternative to full color
Applications:
- Correcting color imbalances or uneven tones
- Adding warmth or brightness to dull hair
- Creating a multi-dimensional effect for a fuller appearance
- Enhancing curls and waves with depth and definition
- Creating a statement look with bold or contrasting highlights
How to Choose the Perfect Balayage or Highlights for You
Consider your natural hair color:
- Balayage is ideal for dark to medium hair, creating a subtle, sun-kissed effect.
- Highlights are suitable for all hair colors, adding contrast and dimension.
Decide on desired effect:
- Natural and sun-kissed: Balayage
- Bold and contrasting: Highlights
Factor in your hair texture:
- Fine hair: Balayage to create fullness
- Thick hair: Highlights to add depth
Common Mistakes to Avoid When Getting Balayage or Highlights
- Over-coloring: Can damage hair and result in an unnatural look.
- Uneven application: Can create unflattering streaks or blotches.
- Incorrect toner selection: Can lead to brassy or orange tones.
- Improper maintenance: Can cause color fading or damage.
Step-by-Step Guide to Achieving Balayage & Highlights at Home
Materials:
- Balayage brush or highlighting cap
- Bleach or hair color
- Developer
- Toner (optional)
- Gloves
- Mixing bowl
Balayage:
- Section hair into 4-6 horizontal sections.
- Dilute bleach and apply it to the brush.
- Hold the brush perpendicular to the hair and paint in vertical strokes, starting from the mid-lengths.
- Avoid touching the roots to create a natural transition.
- Process the bleach for the recommended time.
- Rinse, tone, and condition as desired.
Highlights:
- Section hair and determine desired location of highlights.
- Apply the bleach solution to the sections of hair using foils or a cap.
- Check the bleach regularly to avoid over-processing.
- Rinse, tone, and condition as desired.
Frequently Asked Questions
- Q: How often should I get balayage or highlights?
-
A: Every 6-8 weeks for maintenance
-
Q: Can I do balayage and highlights myself?
-
A: Yes, if you have experience with hair coloring.
-
Q: Does balayage or highlights damage hair?
-
A: It can, if not done properly.
-
Q: Which technique is more expensive?
- A: Balayage tends to be more expensive due to the high level of skill required.
Additional Resources
- Hair Coloring Guide: Balayage & Highlights
- DIY Hair Coloring with Balayage
- Hair Color Salon Guide: Balayage vs. Highlights
Conclusion
Balayage and highlights offer endless possibilities to enhance your hair color and create a stunning, customized look. By understanding the differences, benefits, and applications, you can choose the perfect technique for your unique needs. With the right care and maintenance, balayage or highlights can transform your hair into a beautiful work of art.
