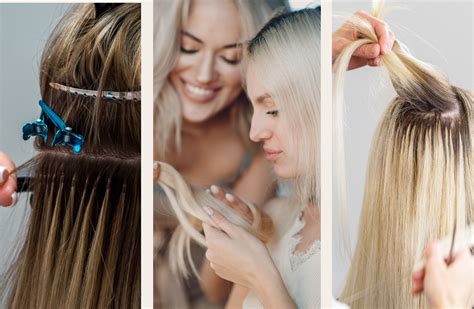
Step 1: Choose the Right Extensions

Selecting the right hair extensions is crucial for achieving a seamless blend with your natural hair. Consider:
- Hair Type: Match the texture and thickness of your hair to the extensions.
- Hair Length: Extensions should be at least 2 inches longer than your natural length for a noticeable impact.
- Color: Choose a color that complements your natural shade or opt for highlights to add dimension.
Table 1: Hair Extension Types
| Type | Description | Pros | Cons |
|---|---|---|---|
| Clip-Ins | Easy to attach and remove | Versatile, affordable | Can be bulky |
| Tape-Ins | Flat wefts taped to natural hair | Thin, discreet | Can damage hair if removed improperly |
| Sew-Ins | Weft sewn into natural hair | Most secure, long-lasting | Time-consuming to install and remove |
| Fusion | Individual strands fused to natural hair | Natural-looking, durable | Can be difficult to remove |
Step 2: Prep Your Natural Hair
Before applying extensions, ensure your hair is:
- Clean: Wash and condition your hair to remove any oils or residue.
- Detangled: Brush thoroughly to prevent tangles during the application process.
- Dry: Extensions adhere better to dry hair.
Step 3: Apply the Fringe
For Clip-Ins:
- Section off a small area of hair where you want the fringe.
- Open the clip and place it securely onto your natural hair.
- Gently blend the fringe with your own hair using a brush or comb.
For Tape-Ins:
- Separate a thin section of hair at the hairline.
- Apply a tape tab to the weft and a corresponding tab to your natural hair.
- Press the tabs together firmly until secure.
For Sew-Ins/Fusion:
- Section off a small area of hair where you want the fringe.
- Hold the weft/individual strands against your natural hair and secure it with thread/fusion bonding.
- Repeat until the fringe is complete.
Step 4: Style and Maintain
- Styling: Use heat-styling tools cautiously to avoid damaging the extensions.
- Washing: Wash extensions less frequently than your natural hair. Use sulfate-free shampoo and conditioner.
- Detangling: Brush extensions gently using a wide-tooth comb or detangling brush.
- Avoid Damage: Limit blow-drying, excessive heat styling, and chemical treatments.
Table 2: Hair Extensions Care Tips
| Care Tip | Frequency | Reason |
|---|---|---|
| Wash | 1-2 times per week | Removes dirt and oils |
| Condition | After every wash | Rehydrates hair and prevents tangles |
| Detangle | Daily | Prevents mats and breakage |
| Trim | Every 6-8 weeks | Removes split ends |
Step 5: Remove the Fringe
For Clip-Ins:
- Simply unclip the fringe from your natural hair.
For Tape-Ins:
- Use a tape solvent to dissolve the adhesive and gently remove the fringe.
For Sew-Ins/Fusion:
- Seek professional assistance for safe removal.
Frequently Asked Questions
Q: How long do hair extensions with fringe last?
A: Clip-ins typically last for several months, while tape-ins and sew-ins can last for up to a year with proper care.
Q: Can I wash my hair with hair extensions in?
A: Yes, but avoid washing too frequently. Use sulfate-free shampoo and conditioner to prevent damage.
Q: Can I dye or bleach hair extensions with fringe?
A: It’s not recommended to chemically treat hair extensions, as this can weaken them.
Q: How much do hair extensions with fringe cost?
A: The cost varies depending on the type of extensions, your hair length, and the salon or stylist.
Table 3: Hair Extensions with Fringe Cost Estimation
| Extension Type | Length | Cost Range |
|---|---|---|
| Clip-Ins | 14-16 inches | $100-$200 |
| Tape-Ins | 16-18 inches | $200-$300 |
| Sew-Ins | 18-20 inches | $300-$400 |
| Fusion | 18-20 inches | $400-$500 |
Conclusion
Hair extensions with fringe can transform your look instantly. By following these steps and tips, you can achieve a seamless and stylish fringe that complements your natural hair. Remember to consult with a professional hairstylist to ensure the right extensions are selected and applied for your individual needs.
