Christmas is a time for joy, laughter, and spending time with loved ones. It’s also a time to get creative and festive with your nails! If you’re looking for some easy and fun Christmas nail designs, you’ve come to the right place. Here’s how to create 5 easy Christmas nail designs that will get you in the holiday spirit:

1. Candy Cane Nails
These classic Christmas nails are easy to create and look festive and fun. To make candy cane nails, you’ll need:
- White nail polish
- Red nail polish
- Black nail polish
- A thin brush or toothpick
Instructions:
- Paint your nails white.
- Once the white nail polish is dry, paint a thin red line down the center of each nail.
- Use a black nail polish to paint a thin line down the center of the red line.
- Allow the nails to dry completely.
2. Christmas Tree Nails
These Christmas tree nails are a fun and festive way to celebrate the holidays. To make Christmas tree nails, you’ll need:
- Green nail polish
- Red nail polish
- Yellow nail polish
- A thin brush or toothpick
Instructions:
- Paint your nails green.
- Once the green nail polish is dry, paint a small triangle in the center of each nail.
- Use the red nail polish to paint a small star on top of the triangle.
- Use the yellow nail polish to paint small dots around the triangle to represent the lights on the Christmas tree.
- Allow the nails to dry completely.
3. Reindeer Nails
These reindeer nails are a cute and festive way to show your holiday spirit. To make reindeer nails, you’ll need:
- Brown nail polish
- White nail polish
- Black nail polish
- Red nail polish
- A thin brush or toothpick
Instructions:
- Paint your nails brown.
- Once the brown nail polish is dry, paint a small white circle on the tip of each nail.
- Use the black nail polish to paint two small dots above the white circle to represent the reindeer’s eyes.
- Use the red nail polish to paint a small triangle below the white circle to represent the reindeer’s nose.
- Allow the nails to dry completely.
4. Snowman Nails
These snowman nails are a fun and festive way to celebrate the holidays. To make snowman nails, you’ll need:
- White nail polish
- Black nail polish
- Orange nail polish
- A thin brush or toothpick
Instructions:
- Paint your nails white.
- Once the white nail polish is dry, paint a small black circle on the tip of each nail.
- Use the black nail polish to paint two small dots above the black circle to represent the snowman’s eyes.
- Use the orange nail polish to paint a small triangle below the black circle to represent the snowman’s nose.
- Allow the nails to dry completely.
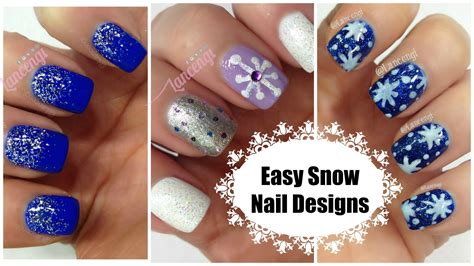
5. Snowflake Nails
These snowflake nails are a beautiful and festive way to celebrate the holidays. To make snowflake nails, you’ll need:
- White nail polish
- Blue nail polish
- A thin brush or toothpick
Instructions:
- Paint your nails white.
- Once the white nail polish is dry, use the blue nail polish to paint a small dot in the center of each nail.
- Use the thin brush or toothpick to paint six lines radiating out from the center dot to create the snowflake design.
- Allow the nails to dry completely.
