Curly Clip-In Extensions: Your Secret Weapon for Instant Glam
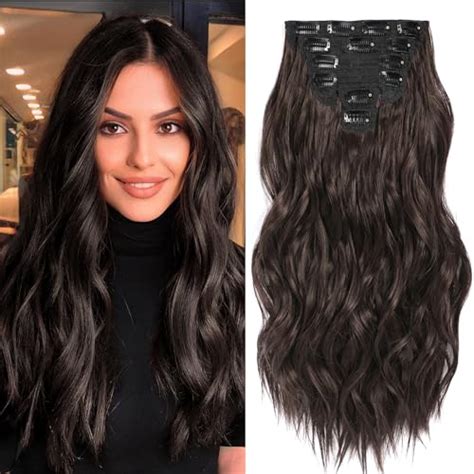
Craving luscious, voluminous curls without the hassle of chemical treatments or waiting years for your natural hair to grow? Curly clip-in extensions are here to save the day! These versatile hairpieces offer a seamless and instant way to add length, volume, and texture to your locks, allowing you to experiment with different styles without committing to a permanent change.

Why Choose Curly Clip-In Extensions?
- Instant transformation: Switch up your hair in minutes, going from sleek and straight to bouncy and curly with ease.
- Versatile styling: Braid, curl, or layer your extensions to create countless hairstyles, from beachy waves to glamorous updos.
- Non-damaging: Clip-in extensions are a gentle and convenient way to enhance your hair without heat, chemicals, or dyes.
- Affordable glam: Compared to salon treatments or wigs, clip-in extensions offer a cost-effective way to achieve the look you desire.
How to Choose the Perfect Curly Clip-In Extensions
- Determine your hair texture: Match the texture of your extensions to your natural hair for a seamless blend.
- Measure your hair length: Extensions come in various lengths, so measure your hair from roots to tips to find the best match.
- Choose the right quantity: Determine the amount of volume and length you desire, considering the thickness of your own hair.
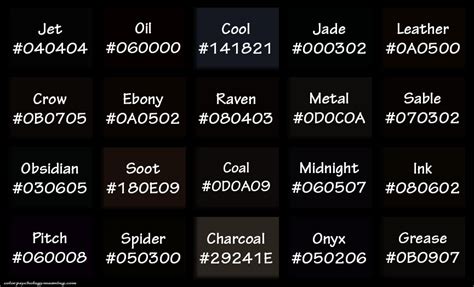
- Match your hair color: Opt for extensions in a shade that complements your natural hair color to avoid any noticeable contrast.
Step-by-Step Guide to Installing Curly Clip-In Extensions
- Section your hair: Divide your hair into upper and lower sections to create a clean work area.
- Tease your hair: Backcomb your natural hair at the roots where the clips will be attached to create friction.
- Attach the extensions: Clip the wefts of extensions into the teased sections, ensuring they lie flat against your scalp.
- Blend the extensions: Use a wide-tooth comb or your fingers to gently blend the clip-in extensions with your natural hair.
- Style as desired: Once the extensions are securely in place, you can style them to your liking using heat tools or styling products.
Creative Applications for Curly Clip-In Extensions
1. Half-Up, Half-Down Do: Add sultry volume to a half-up, half-down hairstyle by clipping in extensions at the crown.
2. Side-Swept Bouffant: Create a voluminous, side-swept bouffant by clipping in extensions at the crown and teasing the top section of your hair.
3. Mermaid Waves: Elevate your beachy waves by adding curly extensions to the ends of your hair, creating a captivating mermaid-like look.
4. Retro Pin-Up: Embody the pin-up girl aesthetic by adding curly extensions to the crown and top of your hair, forming glamorous pin curls or victory rolls.
5. Voluminous Ponytail: Boost the volume and style of a ponytail by clipping in extensions at the base of the ponytail, creating a full and lush look.
6. Dramatic Braid: Enhance the beauty of a braid by integrating curly extensions into the weave, adding texture and depth to the style.
7. Asymmetrical Bob: Create a modern and trendy asymmetrical bob by clipping in extensions on one side to achieve a half-long, half-short look.
8. Curly Bangs: Transform your hair with curly bangs by clipping in extensions to frame your face, adding a playful and bohemian touch.
9. Edgy Shag: Embrace the edgy shag hairstyle by adding curly extensions to the layers, creating a voluminous and textured look.
10. High-Volume Updo: Create a stunning high-volume updo by clipping in extensions at the crown and securing them with bobby pins, adding height and elegance to your style.
11. Braided Crown: Adorn your hair with a braided crown by clipping in extensions to the top of your head and braiding them into an intricate design.
12. Faux Locs: Channel the bohemian vibe by creating faux locs using curly extensions, entwining them with your natural hair for a unique and edgy look.
Table 1: Benefits of Using Curly Clip-In Extensions
| Benefit | Description |
|---|---|
| Instant transformation | Add length, volume, and texture in minutes |
| Non-damaging | Gentle and convenient, no heat or chemicals needed |
| Versatile styling | Braid, curl, or style them to create endless looks |
| Affordable glam | Cost-effective way to enhance your hair without breaking the bank |
Table 2: Types of Curly Clip-In Extensions
| Type | Texture | Description |
|---|---|---|
| Remy Hair | Premium human hair | Silky, tangle-free, and blends seamlessly |
| Synthetic Hair | Heat-resistant fibers | Affordable, lightweight, and vibrant colors |
| Human Hair Blend | Mix of human and synthetic hair | Combines the benefits of both types, providing a natural look and longevity |
Table 3: Steps to Install Curly Clip-In Extensions
| Step | Instructions |
|---|---|
| Section hair | Divide hair into upper and lower sections |
| Tease roots | Backcomb hair at clips’ attachment points |
| Clip in extensions | Position wefts and clip them securely into the teased sections |
| Blend | Use a comb to seamlessly blend extensions with your hair |
| Style | Style extensions with heat tools or styling products as desired |
Table 4: FAQs About Curly Clip-In Extensions
| Question | Answer |
|---|---|
| Are curly clip-in extensions easy to install? | Yes, they are designed to be quick and simple to install, suitable for beginners as well. |
| How long do curly clip-in extensions last? | With proper care, Remy hair extensions can last up to 12 months, while synthetic hair extensions typically last 3-6 months. |
| Can I heat style curly clip-in extensions? | Heat styling is possible, but use low heat settings and apply heat protectant spray to minimize damage. |
| How often should I wash curly clip-in extensions? | Wash your extensions every 8-12 uses, using gentle shampoo and conditioner, and avoid scrubbing or twisting them. |
| What are the most recommended methods to curl short hair? | For short hair, you can use small rollers, a curling iron, or braid damp hair and let it air dry. |
