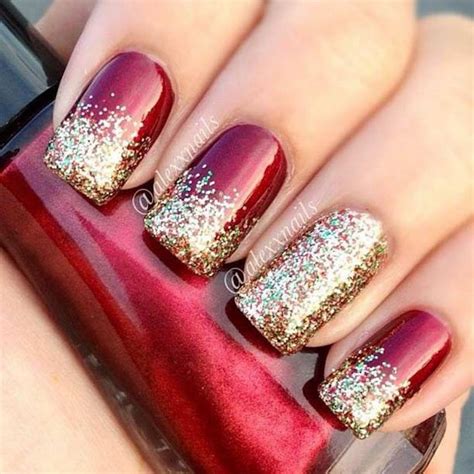
‘Tis the season to be jolly, and what better way to spread some holiday cheer than with festive Christmas nails? Whether you’re attending a festive party or simply want to get into the holiday spirit, these easy Christmas nail designs will help you bring the magic of Christmas to your fingertips.

1. Candy Cane Swirls
Indulge in the classic Christmas treat with these adorable candy cane swirls. Simply paint your nails red or white and create alternating stripes using the opposite color. Add a touch of festive flair by drawing a thin black line down the center of each stripe.
2. Reindeer Antlers
Bring the magic of Santa’s reindeer to your nails with these whimsical antlers. Start by painting a light brown base coat. Once dry, use a thin black brush to draw two curved lines resembling antlers on the top of each nail. Finish with a white dot at the base of each antler to represent the nose.
3. Christmas Tree Triangles
Celebrate the beauty of Christmas trees with these simple yet elegant triangles. Paint a dark green base coat and allow it to dry. Use a lighter shade of green to draw triangles on each nail, creating the illusion of a Christmas tree. Add miniature gold or silver ornaments for a touch of sparkle.
4. Festive French Tips
Give the classic French manicure a holiday twist with festive tips. Paint your nails a neutral color such as nude or white. Once dry, paint the tips of your nails in your favorite Christmas hue, such as red, green, or gold. Add a touch of glitter or rhinestones for extra sparkle.
5. Snow Globe Nails
Capture the magic of a snow globe on your nails. Start by painting a light blue or white base coat. Once dry, use a small paintbrush to create white snowflakes. Add a touch of sparkle by applying iridescent glitter. Finally, use a clear top coat to create a glossy effect that resembles a snow globe.
6. Santa’s Hat
Bring the joy of Santa Claus to your nails with these adorable Santa’s hat designs. Paint a bright red base coat and allow it to dry. Use white nail polish to create a curved brim at the bottom of the nail, resembling Santa’s hat. Add a black pom-pom at the top for a finishing touch.
7. Gingerbread Man Nails
Indulge in the sweet treats of the season with these gingerbread man nails. Paint a brown base coat and allow it to dry. Use black nail polish to draw the outline of a gingerbread man on each nail. Add white details for the icing and sprinkles.
8. Christmas Lights
Illuminate your nails with these festive Christmas lights. Paint your nails black or navy blue to create a nighttime effect. Use a thin brush to paint tiny dots of different colors, resembling Christmas lights. Add a touch of glitter or rhinestones for added sparkle.
9. Snowman Nails
Bring the charm of a snowman to your nails. Paint a white base coat and allow it to dry. Use black nail polish to draw a hat and scarf on the top of each nail. Add orange nail polish for the carrot nose and black dots for the eyes and mouth.
10. Festive Polka Dots
Add a touch of festive fun to your nails with Christmas polka dots. Paint your nails in your favorite Christmas color and allow it to dry. Use a thin dotting tool or a toothpick to create polka dots in contrasting colors. Add a touch of glitter or rhinestones for extra sparkle.
Effective Strategies
- Plan your designs in advance to ensure they are cohesive and polished.
- Use a light hand when applying nail polish to prevent smudging or unevenness.
- Allow each layer of polish to dry completely before applying the next to prevent chipping or peeling.
- Use a top coat to seal your designs and prevent them from smudging or fading.
- Practice your nail art on a piece of paper or a spare nail before attempting the final design.
Common Mistakes to Avoid
- Overcrowding: Avoid overloading your nails with too many designs or embellishments, as it can look cluttered and overwhelming.
- Unclean Lines: Make sure your lines are clean and precise by using a thin brush and a steady hand.
- Smudging: Allow each layer of polish to dry completely before applying the next to prevent smudging.
- Peeling: Use a top coat to seal your designs and prevent them from peeling or chipping.
- Chipping: Avoid using too thick layers of nail polish, as it can lead to chipping and peeling.
Step-by-Step Approach
- Prepare: Remove any old nail polish and clean your nails thoroughly. File them to your desired shape and push back your cuticles.
- Base Coat: Apply a thin layer of base coat to protect your nails from staining and promote adhesion.
- Design: Create your desired Christmas nail design using nail polish, brushes, and any decorative embellishments you may want to use.
- Top Coat: Seal your design with a layer of top coat to protect it from smudging, chipping, and peeling.
- Dry: Allow your nails to dry completely before doing any other activities.
